PI Setup Examples
Extractor planets
P0 -> P1
 8 Factory P1 extraction planet example. Link between Extractor and Storage sometimes needs to be upgraded once.
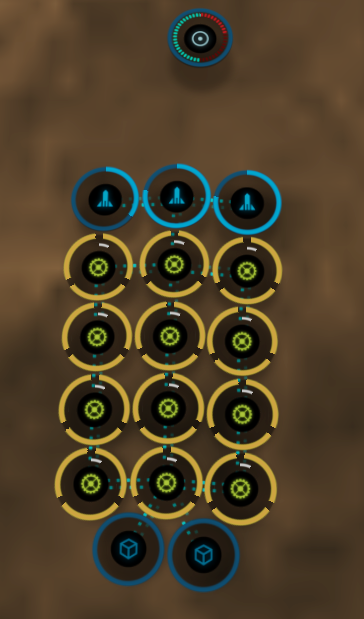
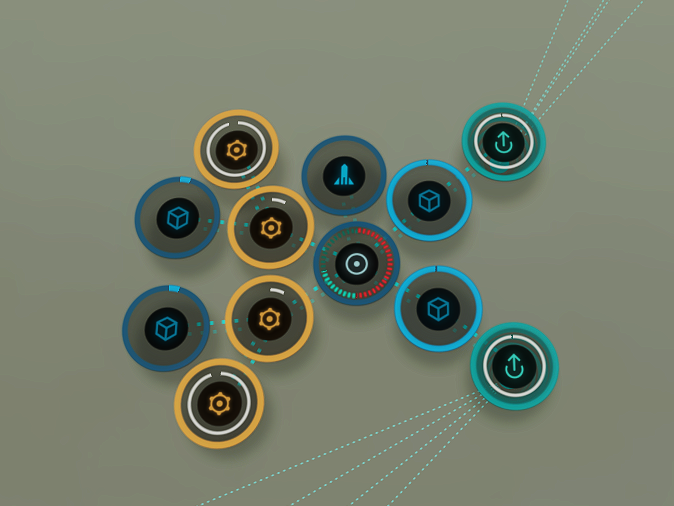 2 Extractors Control Unit with 4 Extractors each &
4 Basic Industry Facilities, each pair producing a different P1 from P0.
2 Extractors Control Unit with 4 Extractors each &
4 Basic Industry Facilities, each pair producing a different P1 from P0.
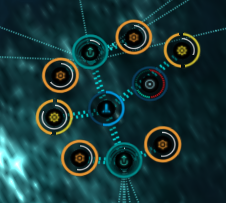
 Another example of a P1 planet producing two different kinds of P1. Requires 24h or shorter cycles to keep productivity up.
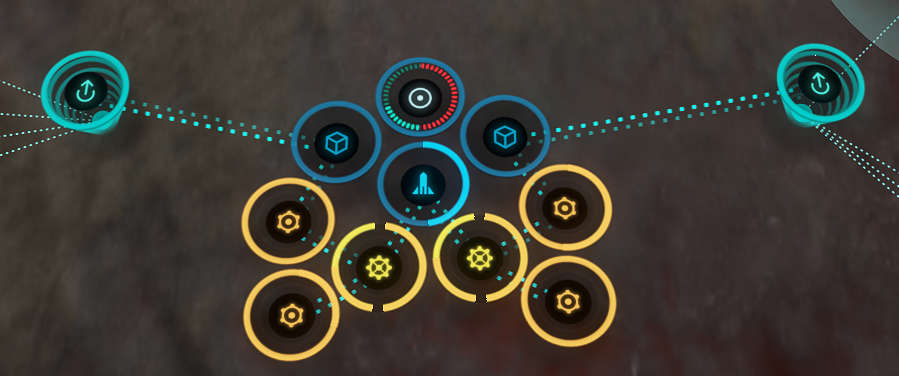
P0 -> P2
- 2 extractors
- each extractor has 2 Basic Industry Facilities for P1 production
- and 2 Advanced Industry Facilities for the P2 production
 P2 setup with extra storage between the extractors and P1 factories. Extractors further apart from the setup to reach hotspots around the far west and east edges.
 P0 > P2 Keep structures close together, use the layout to build towards hotspots. Extractors 4-4, if a P0 is falling behind run 5-3 til they are even. First 3 days run 20k average an hour pulls till the storage units have a good stock of Raw materials. After they are full you can run 2-3 day resets. Keep your extractor average greater than 12k units per hour.
Other
Factory Planets
P1 -> P2
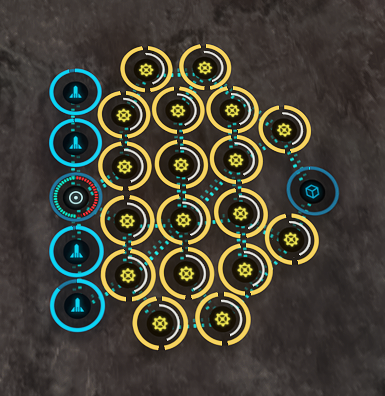
 18 P2 factory planet built for building three different types of P2. Every different P1 input is routed from every top launchpad to every factory so it doesn't matter which P1 goes on which input launchpad.
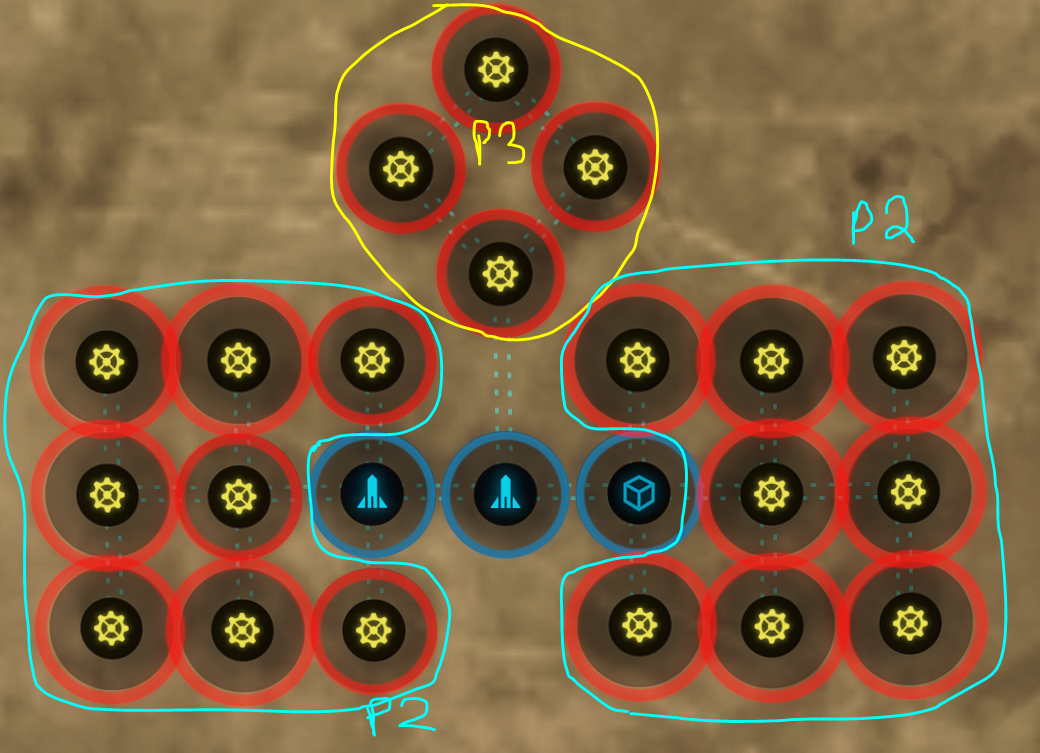
 18 Basic Industry Facilities each pair producing a different P2 from P1 sourced from five different extraction planets for a total import of nine P1 commodities and export of nine P2 commodities.
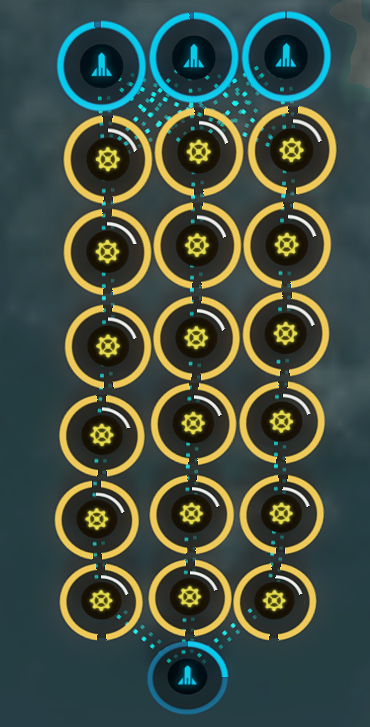
P1 -> P3
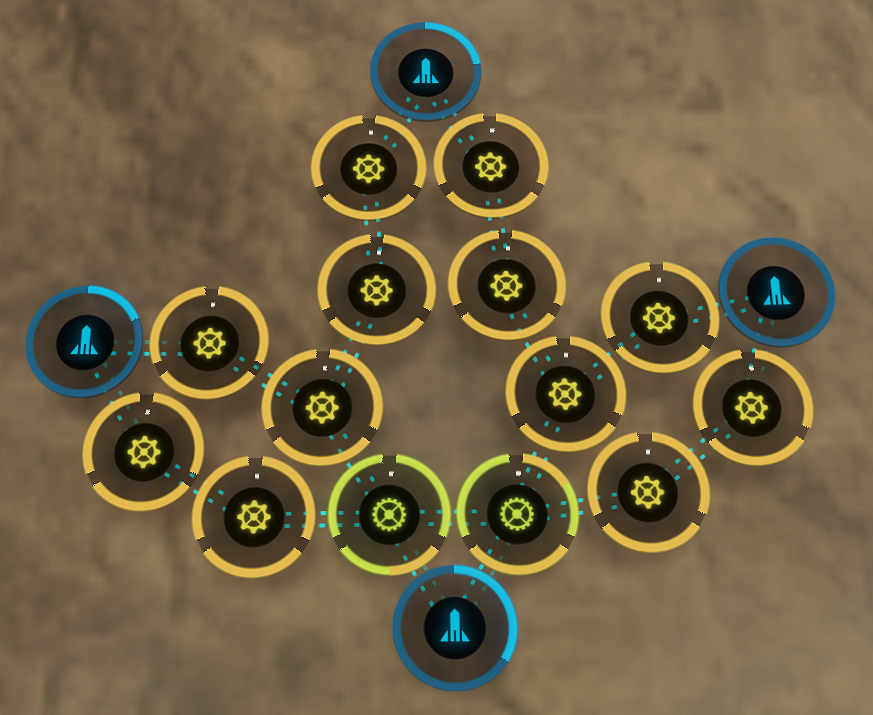
 CCU 4. 16 P2 factories, and 4 P3 factories. Set up so that P1 can be placed anywhere. Needs managing every 2.5-3 days
 CCU 4. 16 P2 factories, and 3 P3 factories with an extra 10k storage. Set up so that P1 can be placed anywhere. Needs managing every 3-4 days. Can dump up to 79k P1 onto the planet and POCO combined, meaning that the POCO only needs to be visited once a week. However, not all the P2 gets converted into P3 so additional planets or CCUV is needed to process all of the P2
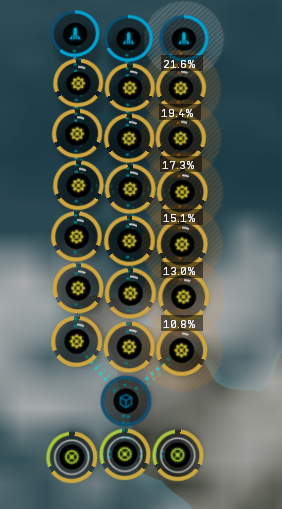
 CCU 5. 16 P2 factories, and 4 P3 factories. If central launchpad is moved elsewhere, P1 can be placed anywhere on the main line and it will reach any P2 factory. Needs managing every 3-4 days. Has enough space to also add 1 P4 factory, preferably next to the central launchpad
P2 -> P3
P1 -> P4
 Setup for Self-Harmonizing Power Cores or Broadcast Nodes, Import 2 P3 and build 1 P3 on the planet.
Import 13k of each P1 into the launchpads, transfer the P1 down to the storage depots, import a second batch of P1 into the launchpads. Feed the P2 factories from the storage depots.
After 3-4 days, transfer the P4 from the output storage depot into the second storage depot and transfer the P1 still stored in the launchpads into the storage depots to start a second cycle.
Setup for Self-Harmonizing Power Cores or Broadcast Nodes, Import 2 P3 and build 1 P3 on the planet.
Import 13k of each P1 into the launchpads, transfer the P1 down to the storage depots, import a second batch of P1 into the launchpads. Feed the P2 factories from the storage depots.
After 3-4 days, transfer the P4 from the output storage depot into the second storage depot and transfer the P1 still stored in the launchpads into the storage depots to start a second cycle.
P2 -> P4
 2 P4 factory planet for any type of P4 that requires 3 Different P3 types.
 A 3 P4 factory version of the previous. P4 is routed to the storage and manually transferred for exports.
 CCU 4. Sterile Conduits. 1 -Extractor & Basic Factory for Water - 12 Advanced - 3 Hi Tech. Input P2 Livestock, Viral Agents, Construction Blocks, Miniature Electronics.
P3 -> P4
 Three different types of P3 as input for mass producing one type of P4. Output divided between two storages and routed back to the launchpads with expedited transfers. Needs CCU 5 and a small planet to fit everything.