−Table of Contents
Planetary Interaction (PI)
Planetary Interaction - A simple guide.
If you add to this page, please add your contact info to the added part so that other people may contact you. thank you 7o
PI TL;DR
PI stands for Planetary Interaction. PI is you building some stuff on a planet that collects the resources on said planet.
After that you can refine those resources Going from:
RO→P1→P2→P3→P4 This link covers the raw materials and what they refine in to.
Then you collect those materials and either sell them or make stuff with them.
You are essentially making material (which sells for ISK) out of thin air and with very little effort.
PI for the Brave Newbro
PI, Planetary Interaction, is an easy way to make passive ISK. But what is involved? PI is utilizing the planets in the world of New Eden to generate commodities which are used in the manufacturing process of just about everything. This is accomplished through a supply-chain meets assembly line of extractors, processors and command centers placed on planets. The extractor heads spider outward and siphon materials from nodes which you then run through processor facilities to turn raw materials into something more useful. Initially one must survey a planet in order to determine the best location for placing facilities. Once that is done, it’s a matter of configuring your planetary colony and then setting your extractor units to run on a resettable cycle and then waiting.
That’s it. That is as simple as I can make PI. But it still doesn’t facilitate the question “How do I make ISK with PI”.
That part is simple. Take a look at the area in which you live. There are a number of solar systems. Once you’ve decided on a solar system you can then use this tool, https://fazenda.github.io/, to cross-reference planet types to obtain an output material. In order to determine what sort of materials you should produce you should simply ask what is in demand but you’ll never get a straight answer to that question because of market crashing paranoia. Generating materials for fuel blocks is the way to go in my opinion, in Fade that's Oxygen Fuel Blocks . That means a focus on the following materials: Coolant, Enriched Uranium, Mechanical Parts, Oxygen, and Robotics. These are P1-P3 Products that should be fairly easy to create with any normal setup on one character working 5-6 planets. But of course, all PI material has uses so if you can’t make any of these try for another.
Myth: PI is super-complicated and difficult to get started
Verdict: Plausible. It is true that Planetary Interaction can be difficult to set up, but that’s not the case as this guide is going to take you step by step through getting your first planet set up and producing materials.
- PI Lesson: There is a logistical aspect of getting PI running that is a one-time initial investment after which you should never have to do it again except in the event of an evacuation.
Myth: PI is a waste of time, you have to check it every hour to make real money.
Verdict: Busted. The amount of money you can make is proportional to the amount of effort and time you want to invest into the prospect. Nobody can say for certain without significant number crunching what your time is worth to you.
- PI Lesson: Your extractor heads for extracting raw materials to process into P0-P4 Commodities operate on cycle that you must restart at an interval you decide. A longer cycle (up to 14 days) will not yield you any more than 1 hour cycles over the same amount of time. I personally set mine to 3 days (72 hours) at a convenient time that I could check and restart the process.
Myth: All the good planets are taken, the only real money is in P4 commodities.
Verdict: Busted. All commodities are used in some way or another. P0, raw materials, are the building blocks of better materials. Compression, converting Raw → P1 → P2 etc., is just as important as managing 6 colonies that only produce P1 Materials.
- PI Lesson: Such negativity! I made plenty of money focusing only on P1 and P2 materials. If I were using 3 characters and using 18 Planets to produce P4s, I probably could’ve PLEX’d my account and then some but at the end of the day I was happy to make what I made because it was PASSIVE income.
Myth: PI is only worth it in Wormholes.
Verdict: Busted. PI is good anywhere you can lay down a Command Center and suck the planet dry without having to fight for nodes. PI is not worth it in Hi-Sec because it’s so heavily farmed. Null-sec and W-Space are ideal places to do PI because for the most part there isn’t much competition.
- PI Lesson:
You need some skills bro!
Planetary interaction is just a fancy way of saying money printers; to set up your money printers you need to train a few skills first:
- Required
- Interplanetary Consolidation IV. (allows you to have more planets)
- Command Center Upgrades IV. (upgrades the number of installations you can install per planet)
- At first, do not train to V as that takes longer than setting up an alt with CCU IV and IPC IV (In numbers, training to five will take at least 16 days for each skill, training new alt will take 12 days)
- Optional
- Planetology. (Shows you accurately where planet resources are concentrated)
- Advanced Planetology. (Same as Planetology only stronger, more accurate results)
- Remote Sensing. [allows you to scan planets from 'x' light years away (not really useful for this guide)]
Let's set up your planets!
You now have everything planned out; you've chosen your planets, you've chosen what you're making on those planets and you even know what resources to mine so that you can make your items.
Before we get to the Step by Step there is a few things you need:
- an industrial ship. I strongly suggest buying an Epithal, they have a PI bay which can hold a lot of PI commodities. (for picking up your items. The PI bay will not hold command centers.)
- having access to a POS in system is very helpful for dropping your command centers, just keep a little bit safer.
- A small amount of ISK to upgrade your command center and set up your planet.
Step by Step Set-up.
Step 1: Command Centers.
Buy your command centers- each planet has a specific command center, for example. 'Lava planets' need a 'Lava Command Center'.
Step 2: Get into space.
Load your command centers into your ship's hangar and safely get it to your local POS. (If you got the Epithal then you will be able to fit it full of Warp Core Stabs)
Step 3: Drop the Command Centers.
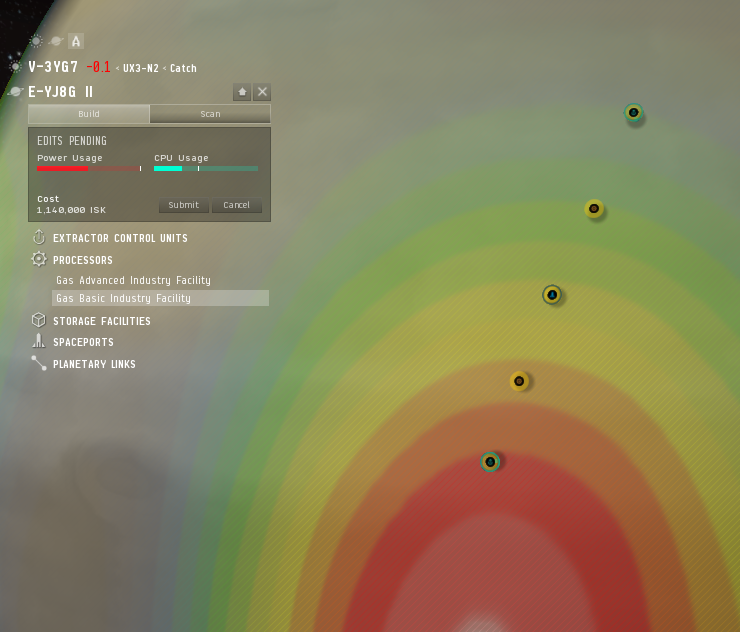
Drop all of your command centers onto your planet. Don't scan for the best spot during this step, the command center DOES NOT need to be connected to the Launchpad.
Step 4: Go home, Get drunk.
Dock up and drink some whiskey… you don't need to have your hauler in space till you pick up your stuff in a week or two.
Step 5: Scan for the sweet spot
Now you start scanning your Planet.
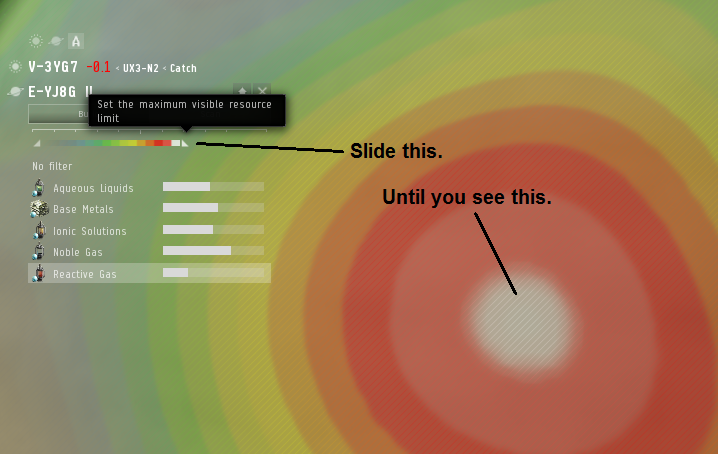 Quickest PI scanning guide ever Keep making the scan better until you can only see one dot of white. This is the highest concentration of that resource on the whole planet.
- Start with the least common resource you need.
- Check the other resource you need to make sure it isn't too far away.
Step 6: Place Extractor Control Units.
 Extractor Control Unit One Place your first extractor control unit on the edge of least common resource. make sure to place it on the closer side to the other resource you need.
 Extractor Control Unit Two Place the Second extractor control unit on the edge of the other resource you need. make sure its close to you other extractor control unit.
Step 7: Place Launchpad.
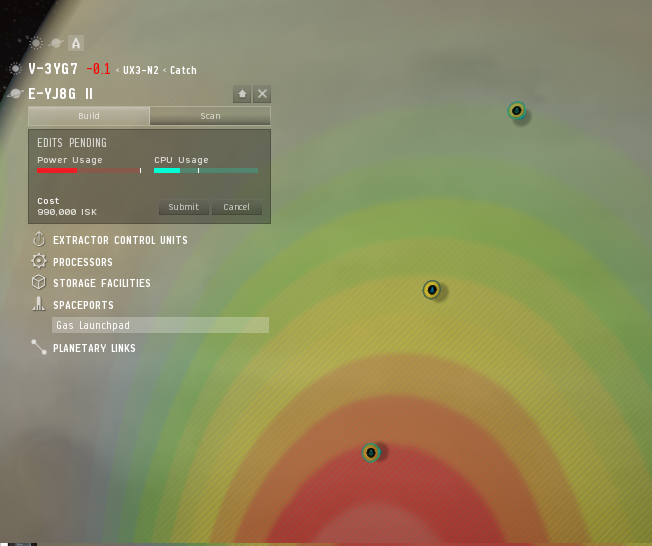 Launchpad Place your Launchpad between your two extractor control units. (this will be your storage)
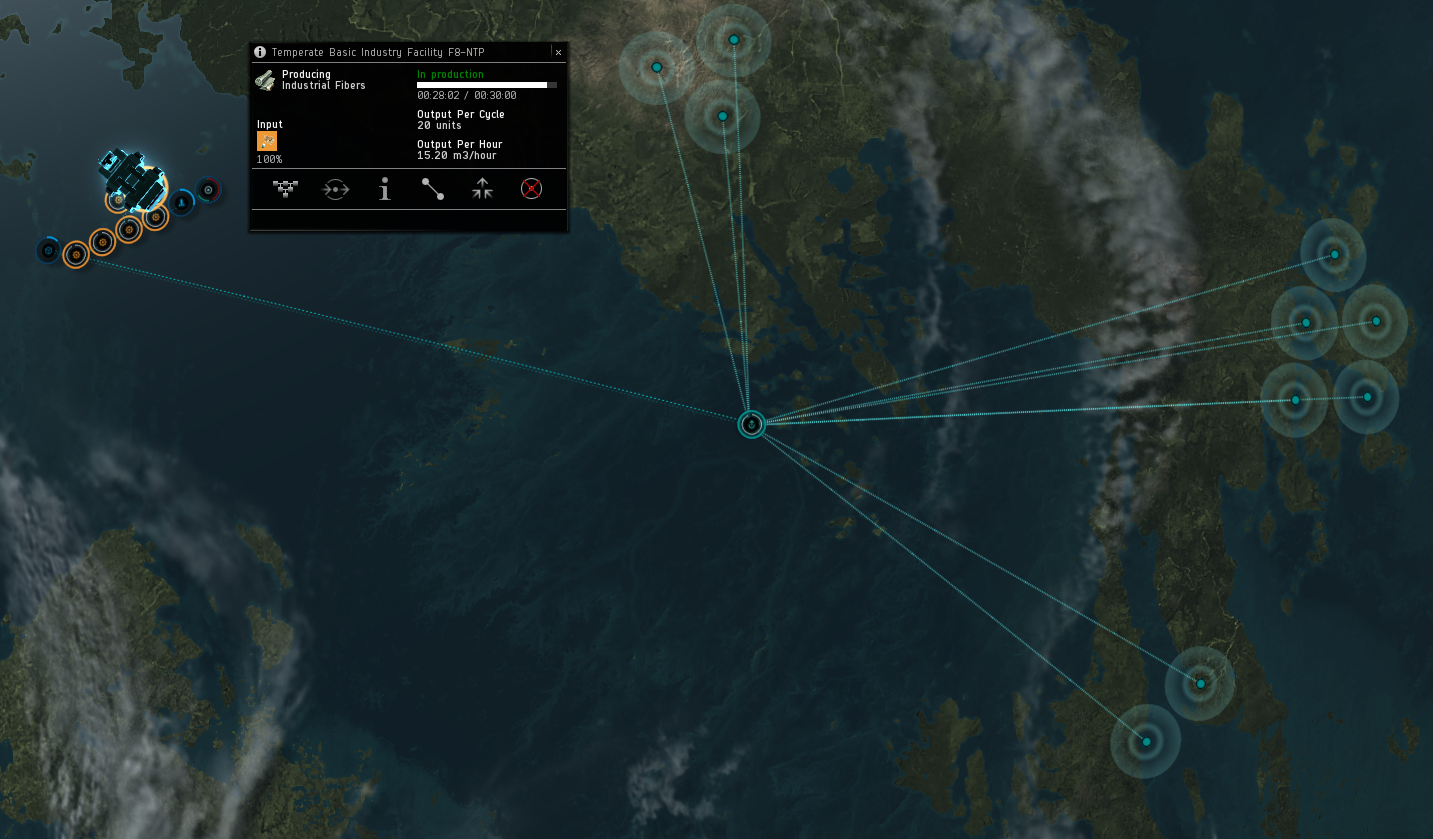
Step 8: Place Basic Industry Facilities.
 Basic Industry Facilities Place two Basic Industry Facilities, one each side of the Spaceport, between the Launchpad and Extractor Control Unit.
Step 9: Place the Advanced Industry Facility and Link up all of your installations.
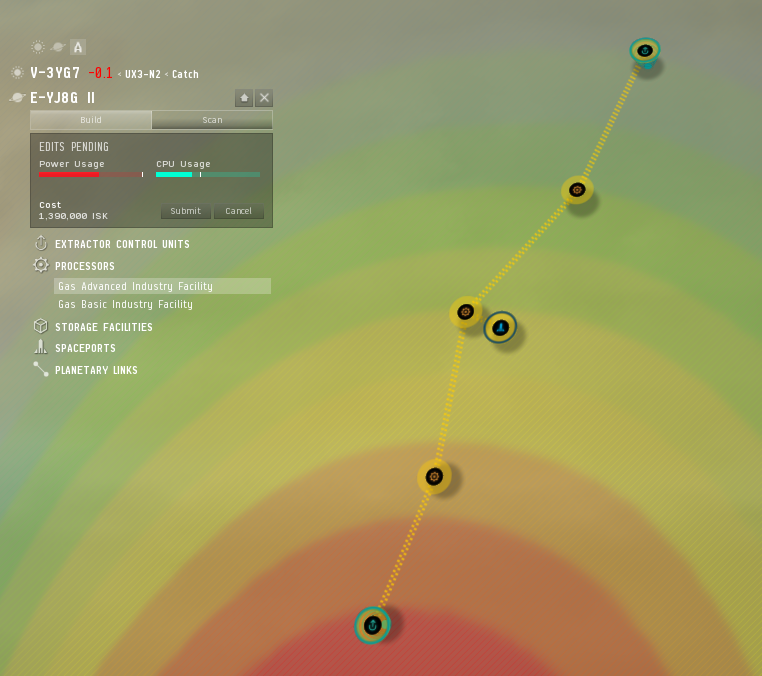 Advanced Industry Facility and Links Place your Advanced Industry Facility next to your Launchpad.
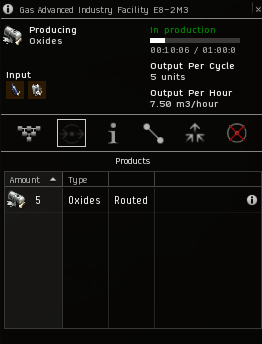
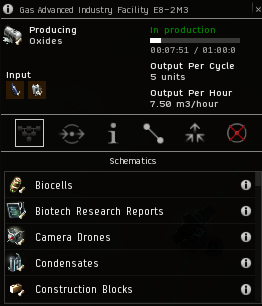
Step 10: Select your Schematics.

- Click your Industry Facility.
- Click on the Schematics tab.
- look for the Schematic you need. (the basic facilities will need the Schematic of P1 item you're producing)
- Do this for all industry facilities.
Step 11: Create your routes.
- Select an Extractor Control Unit or an Industry Facility, open the Products tab, and select the incoming or outgoing resource. Click "Create Route," then select the destination facility.
- Start with your Advanced Industry Facility and route the finished product to your launchpad.
- Basic Industry Facilities should them to the Advanced Industry Facility.
- Extractor Control Units should route the mined resources to the Basic Industry Facilities.
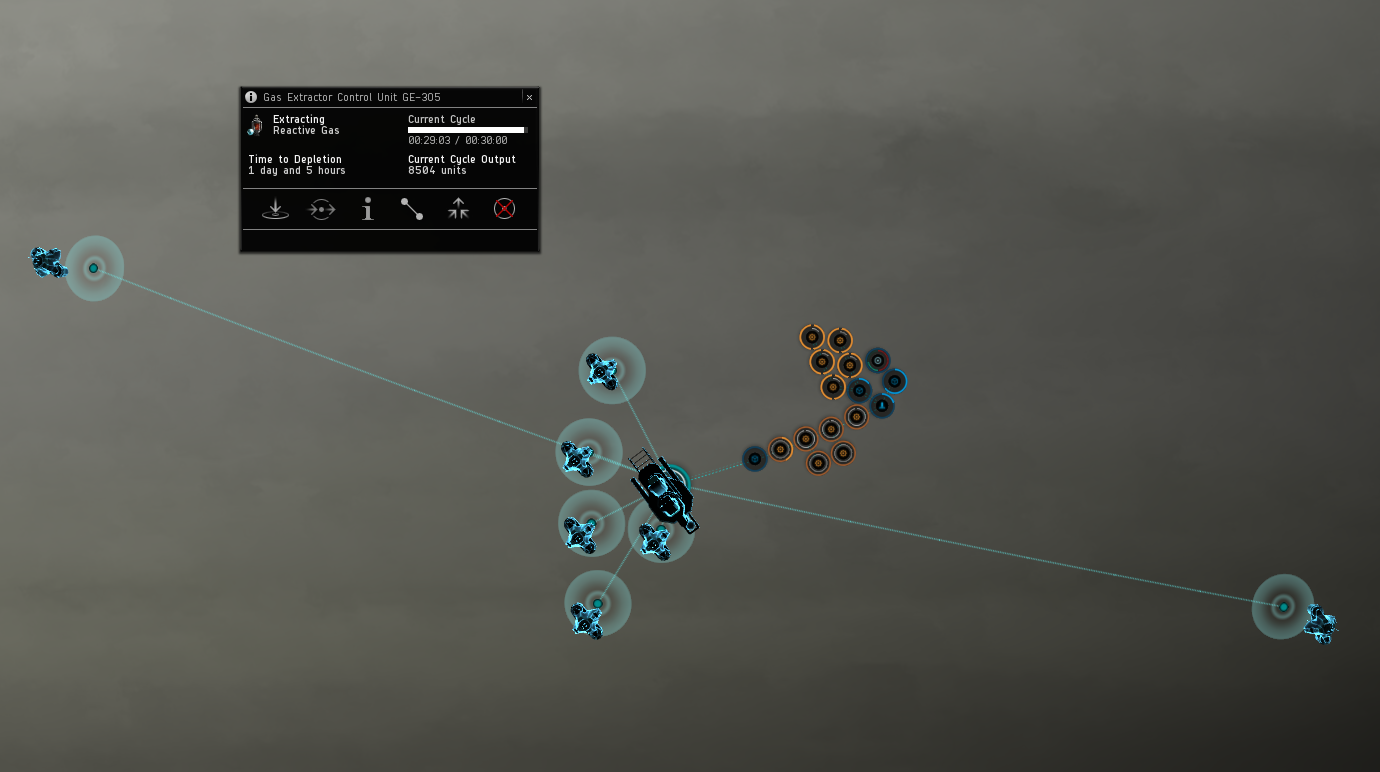
Step 12: Starting your Extractor Control Units.
You're almost making money, all you need to do now is set up your miners to work! This bit can be a little bit fiddly till you get the hang of it, you need to balance the intake of each of you Extractors eg.
- Select one of your Extractor Control Units and press 'Install Extractors'
- Select the Raw Resource your Extractor will be mining on the right of the new window
- Set your cycle timer using the 'Program Duration' slider
- Install and place a few extractors in and around the white concentration of resources
- Place your extractors as close together as they can get without overlapping so you don't lose any efficiency. Try zooming in the camera all the way to make fine adjustments
- Press 'Start Extraction' to begin harvesting and processing
- Change your resource scanning filter to your second raw resource and repeat the process for your second Extractor Control Unit
- Work to balance your 'Units Extracted' value for both of your resources to minimize waste. 750k units of each is a good place to start.
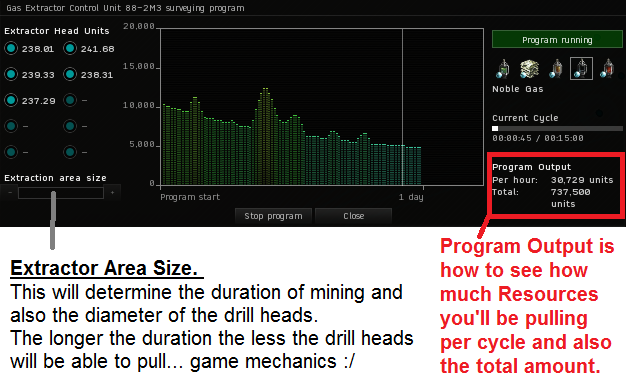 Extracting Resources I like to set my 'Program Duration' to 1 day. if you're lazy then you can set it to 3 days or even a week.
Claiming your Pay Check!
So its been a week or so and you have all of those glorious products sitting on your launchpad. It looks about time to go pick them up and sell them on for ISK.
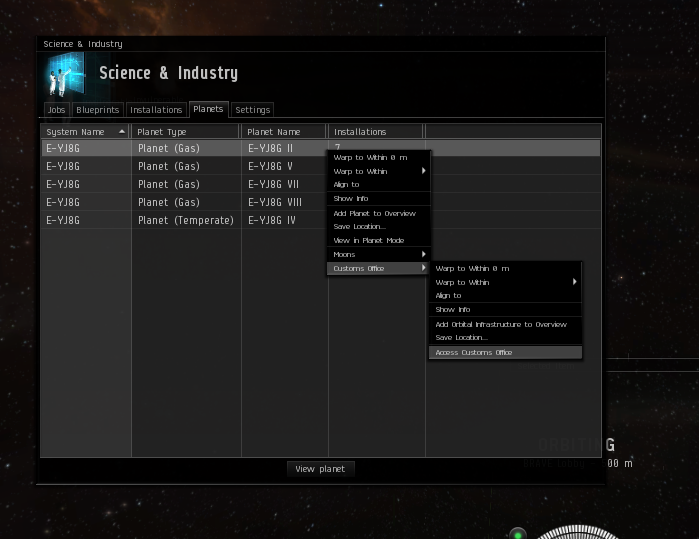
- Get back into your hauler and get to your local POS.
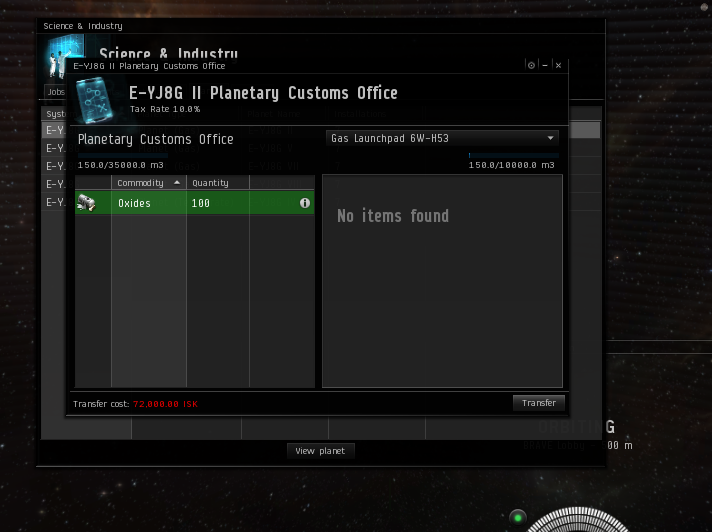
- Transfer the items from your Launchpad to the POCO. Make sure you have ISK to launch it from your planet.
- Repeat for all other planets you work with.
Now you can warp to all of the POCOs and pick up your bountiful harvest.
Your products probably won't sell on your local market/staging system. There is buy back systems which pay good prices and also help the alliance/coalition as a whole.
A few things to note:
- Nullsec is the second best place to do PI after wormholes. (seeing as though our Coalition has nullsec SOV, you need to make the most of it)
- If your Extractors are pulling over 10k per cycle, stick another processor down per extractor, you may not have enough for the whole process but it does add up.
- Once your PI site runs low on resources, do another scan and relocate your operations. (it doesn't cost a lot)
- Keep an eye on local if you're in Lowsec. (you don't want to lose your pay check!)
- There is no rush to move items from your planets, do it when you know nobody will be online.
- Do not forget to cycle your processors, if you don't reactivate them then you're just losing ISK.
- Use your Alliance buyback programs for PI, this will help out your friends.
- Alliance buyback works from the main systems we own, such as our staging systems.
- Fly BRAVE 7o.
Planet Setup Types
Here are some examples of PI setup types. For more picture examples, see PI Setup Examples.
P0 to P2
The most common type of setup in all of PI. There are a several variations on this.
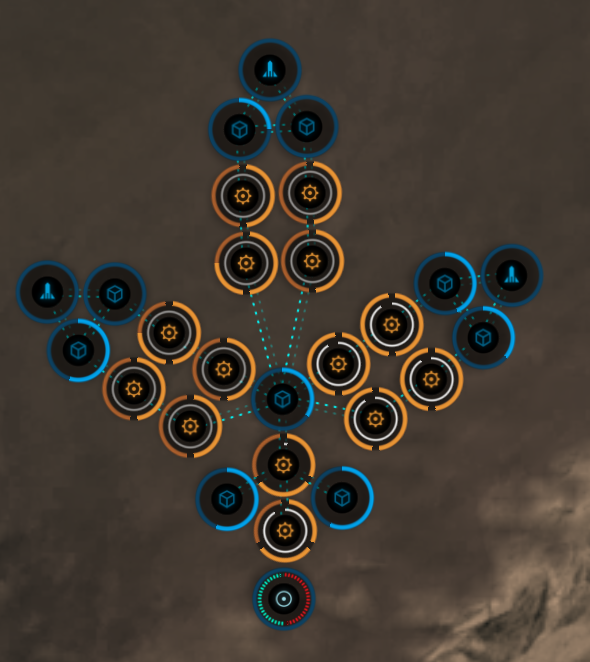
* Standard Setup This one is a pretty lucky setup. If necessary, you can drop to 4 basic processors and 2 advanced and use more extractor heads.
* Navi Setup This will require you to switch which P0 you're extracting and routing on a regular basis. It takes significantly more clicks, but it's more efficient. It saves on power grid by placing only one extractor control unit and swapping which resource it gathers often, allowing you to use more extractor heads on your one ECU. The basic factories here always stay 3 producing 1 P1, and 3 producing the other P1. There's no need to switch those. The key is to swap which resource you're gathering often enough that you never run out of either resource. If you need to squeeze every last drop out of the planet, this is the setup to use. Keep in mind that it's nearly free to destroy and replace your ECU.
P0 to P1
Needed for Microfiber Shielding, Polyaramids, and Silicate Glass
Avoid this whenever possible. Some P2s can not be made on one planet and will require this.
Setup
P2 with imported P1
Needed for Microfiber Shielding, Polyaramids, and Silicate Glass
Avoid this whenever possible.
Setup
P2 to P4 (no P1 required)
Double Setup (CCU5 required)
Single Setup (CCU4): You can just remove half of your processors. I recommend keeping the storages and launchpads for tons of buffer space.
P2 to P4 (P1 required)
Needed for Nano Factory, Organic Mortar Appliators, and Sterile Conduits
Single Setup: If your P1 can be produced on a barren or temperate planet, you're going to do this very similarly to the no P1 required setup above, but replace one of the P2 → P3 production lines with an extractor control units and P0 → P1 processors.
Shitty Diagram
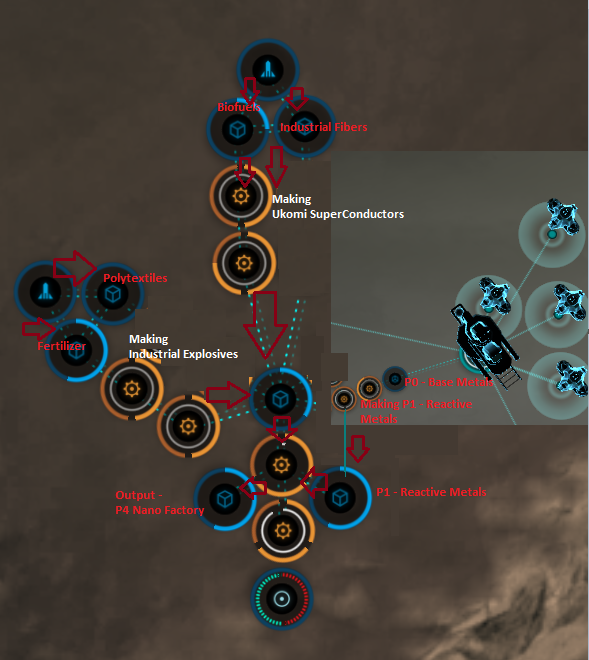
Skilled up and ready to choose some planets!
I strongly suggest keeping your PI all in the same system. you don't want to be jumping your hauler around with your paycheck sitting in it right?
We're keeping this simple so using a single planet production chain is the best way to go. You'll generally want to use something very similar to either the Standard Setup or the Navi Setup as listed below in Planet Setup Types. Generally the only exceptions to this are Microfiber Shielding, Polyaramids, and Silicate glass for P2s, and production planets for P3s and P4s, which have alternate setups listed in those Planet Setup Types. The number of storage facilities can generally be adjusted to preference.
NOTE:
- When choosing planets try and stay away from planets with a large diameter, linking up your installations will use up a lot of Powergrid and CPU.
- Gas planets suck… they normally have a large diameter and the resources deplete fairly quickly.
How to make those P2 items!
Let's look at the Standard Setup.
- Buy your command centers- each planet has a specific command center, for example. 'Lava planets' need 'Lava Command Center'. You can request these from "The Brave Dojo" corporation, just like skillbooks.
- Load your command centers into your ship's cargo and safely get it to your local POS or into a safe and cloak up. A basic t1 industrial such as an iteron is good for this.
- Start by finding a planet that has a good concentration of the two resources you want.
- Find a spot where these resources are fairly close together and abundant, and place your command center there. Upgrade your command center whenever necessary in these instructions. Your command center won't be used for anything, but it decides where your camera centers every time you look at the planet in planet mode.
- Next to it place your launchpad.
- Then place your 2 ECUs in a location as close to your launchpad as you can while still covering the spots you want to gather resources from.
- Then place 3 basic processing facilities in a line in the direction of each of your resources, as close to each other as you can for the shortest links possible. We use this configuration so that the width of your processing facilities will cut down on the length of your link to your ECUs.
- How many storage facilities you have is sort of personal preference. See the storage section for more. At the end of each chain of processors, put a P0 dedicated storage facility.
- In a third direction put two or three advanced processors to make your P2s.
- Link everything together as shown in the Standard Setup screenshot and set schematics for all of your processing facilities.
- Set and place extractor heads for each of your ECUs. I start with one and put in as many extractor heads as I can until I get the out of power message, and then remove half of them (which will be used at the other ECU). I generally like to set the time to 2 days, 1 hour, 30 minutes (if you click just past the 'n' in extraction, you'll be close to that). This is as long as you can set it and still have 30 minute extraction cycles.
- On your ECU click routes and route your product to your P0 facility.
- On your P0 facility click routes, select the incoming product, and route that to each of your P1 processors.
- Route your P1 processors to your P1 storage (launchpad in this case).
- Route your P1 storage to your P2 processors.
- Route your P2 processors to your launchpad.
- Hit submit.
- Verify that the routes on each of your P1 processing facilities have 1 incoming and 1 outgoing product. Ignore transferring products.
- Verify that the routes on each of your P2 processing facilities have 2 incoming and 1 outgoing product.
- Verify that your ECU is counting down and is routed.
Storage
Rule #1: Always route to or from a storage facility or launchpad. Never route directly between ECUs and processors or between two processors. Doing this allows any overflow to be stored for later use. Not doing this is very likely to get your most advanced and expensive products dumped into the ground.
More storage means more hands free and passive, but less efficient than if you maintain it daily. I prefer more storage because if I'm going to spend more time on PI, I would just use more characters and more planets instead of micromanaging individual planets more than I need to. Theoretically, you can run everything from just the launchpad with no storage facilities. However, I find that things fill very easily with P0, meaning that while the facility is full, anything that is produced from anywhere else is thrown in the trash. Having your two P0s sharing a facility is viable, but even then I've found that it can get congested with your abundant P0 and leave your weaker P0 without space and end up throwing production of your weaker P0 in the trash. I generally recommend at least a dedicated storage facility for each P0, and a launchpad for your P1s and P2s. You can optionally add a dedicated storage for your P1s, or have your P0s share a facility.
Making Advanced P4 Items
Don't be afraid to just make and sell P2s. But if you want to go farther, this is how. This is going to require multiple characters or buying P2s off the market to make it work. Don't forget you can always spend a week or two training a second character on your main's account or buy multiple character training to spend 2 weeks each training your blank character slots on your main account.
I find it convenient to produce up to P2s on each planet when possible. Wetware mainframes take a lot more P2s to make (9), but you can make each of the P2s on one planet. Self-Harmonizing Power Cores and Broadcast nodes take less P2s (6), but half the P2s needed require two planets to make. I've done Organic Mortar Applicators on one character before, but you really either want two characters for that or you'll need to buy P2s to really make it worthwhile.
Generally with these setups you're going to have a bunch of harvesting planets (making P2s whenever possible for convenience), and you're going to have a major factory planet that doesn't extract much, if anything. The tax rate on your factory planet is extremely important. Here you'll be both importing (paying half the rate) and exporting, paying the full rate of the finished P4, and this is after you've already been taxed exporting those P2s once. The tax rate on P2 harvesting planets is less important.
It's not a bad idea to have notepad open and take notes while you're figuring this stuff out.
See P4 Examples for examples of P4 setups made by Brave members.
Miscellaneous Useful Links
Material Diagrams
Great Visual Ingredient Guide
Eve Uni's Ingredient and Use guide
Power Grid Requirements
Outline Ingredient and Amount guide
K7D-II planet map, DOTLAN can show you the maps on each system by looking at the system and then celestial page.
EVE Uni planet browser tool
Fazenda (Farm)